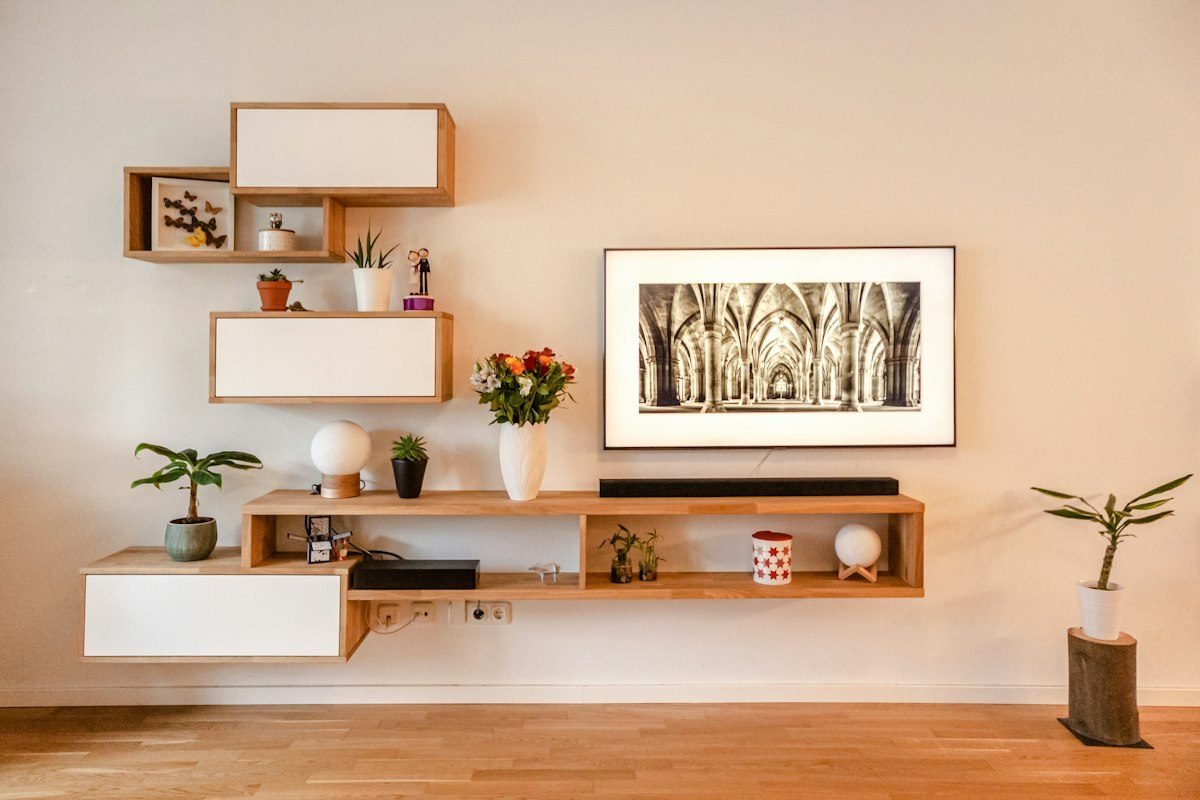
Floating shelves are one of the most transformative architectural additions you can integrate into a modern home. By stripping away visible diagonal corbels, clunky metal shelf brackets, and bulky vertical standards, floating shelves create a clean, minimalist aesthetic where decorative pottery, curated book collections, and lush trailing houseplants appear to hover effortlessly against the wall.
Yet, floating shelves also represent one of the most frequently botched home DIY installations. Walk through everyday homes, and you will inevitably encounter sagging shelves tipping precariously forward, crumbling drywall anchors tearing free under modest loads, and unsightly gaps where the rear shelf edge fails to contact the plaster plane.
The challenge lies in fundamental physics: a floating shelf is a pure mechanical cantilever. Without lower diagonal triangulated bracing, every ounce of weight placed on the shelf creates dramatic rotational leverage that seeks to pry the upper fasteners directly out of the wall studs.
Executing heavy-duty, commercial-grade floating shelves requires precision structural engineering, rigid stud anchorage, and flawless cabinetry execution. Here is your definitive, step-by-step master manual for measuring, fabricating, mounting, and loading custom floating shelves that remain rock-solid and level for decades.
Key Takeaways & Quick Summary
- Load physics: Floating shelves act as severe mechanical levers; every pound placed on the shelf edge exerts exponential rotational torque on the wall fasteners.
- Stud anchoring is non-negotiable: Never rely on hollow wall drywall anchors for floating shelves intended to carry books, ceramic dinnerware, or heavy glassware.
- Hidden bracket engineering: Solid steel rod backplates welded with perpendicular mounting prongs deliver 100+ lbs capacity per shelf when lagged into studs.
- Torsion box construction: Crafting hollow-core shelves using internal pine ladders wrapped in 1/4-inch hardwood plywood maximizes rigidity while slashing deadweight.
- Precision drilling jig: Ensure blind shelf bracket holes are drilled perfectly perpendicular using an engineered drill press or precision doweling guide.
- The Physics of Cantilevered Shelving: Load Capacities and Structural Sizing
- Two Core Construction Methods: Torsion Box vs. Solid Timber Slab
- Wall Mapping and Anchoring Protocols: Finding Studs with Surgical Accuracy
- Step-by-Step Installation: Leveling, Drilling, and Perfect Flush Seating
- Comparative Decision Matrix
- Frequently Asked Questions
- Master Execution Roadmap & Troubleshooting
The Physics of Cantilevered Shelving: Load Capacities and Structural Sizing
Understanding Rotational Leverage and Deflection
When an object sits on a conventional bracketed shelf, downward gravitational forces are transferred down a 45-degree angle directly back into the wall stud via compression. In a floating shelf, that compression member is entirely missing. Instead, the top mounting fastener experiences extreme tensile pull-out stress, while the bottom edge of the shelf pivot point exerts intense compressive force against the drywall.
The deeper the shelf, the greater the mechanical leverage. A 12-inch deep shelf experiences twice as much rotational torque as a 6-inch deep shelf carrying the exact same weight. For general kitchen dishware, book storage, and bar displays, limit shelf depth to 9 to 11 inches unless utilizing specialized commercial welded steel backing plates anchored across three or more wall studs.
Weight Limits: Decorative vs. Heavy Utility Demands
Before designing your shelves, categorize their intended service load. Decorative art shelves (carrying small picture frames and lightweight succulents) require roughly 15 to 20 pounds of capacity per linear foot. Living room bookshelves require 35 to 50 pounds per linear foot. Kitchen dinnerware shelves—stacked with heavy ceramic plates, cast iron cookware, and glassware—require a minimum of 75 to 100+ pounds of load capacity.
Matching your structural method to these load profiles dictates whether you can build a lightweight internal wooden 2×2 torsion ladder or must invest in heavy-gauge welded steel blind shelf brackets.
Editorial Pro Tip: When implementing the physics of cantilevered shelving: load capacities and structural sizing, consistency in planning and respecting material integrity yields far greater longevity than rushing to complete the work. Prioritize safety, ergonomic comfort, and enduring quality.
Two Core Construction Methods: Torsion Box vs. Solid Timber Slab
Method A: The Hollow-Core Torsion Box (Lightweight & Warp-Proof)
The torsion box method is the industry standard for thick, modern architectural floating shelves (2 to 3.5 inches thick). The internal structure consists of a rigid mounting cleat (or ‘ladder’) built from straight, kiln-dried 2×2 pine, where perpendicular ribs extend outward at 12-inch intervals.
This internal wooden skeleton is mounted securely to the wall studs using heavy 3-inch structural lag screws. A hollow decorative sleeve—constructed from 1/4-inch hardwood plywood (oak, walnut, or maple) with a solid hardwood front nosing edge—is then slid over the internal cleat and pinned in place with discreet brad nails.
This design yields an incredibly stiff, strong shelf that weighs less than one-third of a solid timber slab, significantly reducing the deadweight load on your wall fasteners.
Method B: Solid Hardwood Slab with Blind Steel Rod Brackets
For a sleeker, lower-profile aesthetic (1.5 to 2 inches thick) showcasing natural live edges or solid timber end grain, use solid hardwood slabs (White Oak, Walnut, or Hard Maple) paired with heavy-duty blind steel brackets.
A blind bracket consists of a flat steel backplate (typically 3/16-inch thick) with solid steel round rods (1/2-inch or 3/4-inch diameter) welded perpendicular to the plate at precise stud spacings. The backplate is countersunk into the rear edge of the wood slab using a router, while deep precision holes are bored into the rear edge of the timber to receive the steel rods.
When installed, the metal bracket is completely concealed inside the timber, creating a seamless, floating illusion that can support over 150 pounds when anchored across two or three studs.
Editorial Pro Tip: When implementing two core construction methods: torsion box vs. solid timber slab, consistency in planning and respecting material integrity yields far greater longevity than rushing to complete the work. Prioritize safety, ergonomic comfort, and enduring quality.
Wall Mapping and Anchoring Protocols: Finding Studs with Surgical Accuracy
Locating Wall Studs and Mapping Utilities
Never guess where wall studs are located. Residential framing in North America and modern construction typically places vertical 2×4 wooden studs at 16-inch centers (measured from center-line to center-line), or occasionally 24-inch centers.
Use a multi-mode electronic stud sensor that detects both wood framing and live AC electrical wiring. Confirm stud boundaries by sliding a powerful neodymium magnetic stud finder vertically along the wall; when the magnet clings firmly to drywall screws, you have pinpointed the exact vertical center-line of the stud.
Before drilling, mark the left edge, right edge, and center of every stud along your horizontal layout line. If a floating shelf spans 48 inches, ensure your bracket secures into at least three separate studs.
Fastener Sizing: Structural Lag Screws vs. Expanding Anchors
Never use plastic drywall anchors, toggle bolts, or molly bolts as the primary support for floating shelves! They will inevitably fail under dynamic loads.
Fasten your mounting cleats or steel brackets using 1/4-inch or 5/16-inch diameter heavy-duty structural wood screws (such as GRK RSS or Simpson Strong-Tie SDWS screws) with a minimum length of 3 to 3.5 inches. Accounting for 1/2-inch drywall thickness, this ensures at least 2.5 inches of high-tensile thread engagement deep into the structural heartwood of the wall stud.
Editorial Pro Tip: When implementing wall mapping and anchoring protocols: finding studs with surgical accuracy, consistency in planning and respecting material integrity yields far greater longevity than rushing to complete the work. Prioritize safety, ergonomic comfort, and enduring quality.
Step-by-Step Installation: Leveling, Drilling, and Perfect Flush Seating
Establishing the Laser Reference Line and Scribing the Wall
Drywall surfaces are rarely dead flat; they contain bows, tape seams, and plaster humps. Set up a self-leveling cross-line laser level to project a crisp horizontal datum line across the installation wall.
Hold your shelf against the wall along the laser line. If your wall has a noticeable curve, hold a compass or pencil flat against the wall and trace the wall contour onto the rear edge of the shelf—a technique known as ‘scribing.’ Plane or belt-sand the rear edge to match the scribe line, ensuring an airtight, gap-free fit against the wall.
Securing the Cleat, Boring Blind Holes, and Final Micro-Adjustment
For blind rod systems, boring perfectly perpendicular holes into the rear edge of a solid slab is critical. A drill bit tilted by even one degree will cause the shelf to bind on the steel rods or sit crooked. Use a commercial doweling jig or drill guide clamped rigidly to the slab edge, boring 1/16-inch deeper than the bracket rods.
Mount the steel backplate to the wall studs, drive the structural screws 90% tight, verify bubble level in both the horizontal and front-to-back pitch axes, and shim the backplate if necessary to ensure the rods point upward by a subtle 1/16-inch. This tiny upward pitch accounts for natural wood deflection once the shelf is fully loaded with weight.
Editorial Pro Tip: When implementing step-by-step installation: leveling, drilling, and perfect flush seating, consistency in planning and respecting material integrity yields far greater longevity than rushing to complete the work. Prioritize safety, ergonomic comfort, and enduring quality.
Comparative Decision Matrix
Use this structured comparison to weigh critical options, material requirements, cost allocations, and long-term performance.
| Bracket & Mounting System | Max Weight Capacity | Min Shelf Thickness | Ideal Use Case | Cost per 4-Foot Shelf |
|---|---|---|---|---|
| Internal Wood 2×2 Torsion Ladder | 50 – 75 lbs | 2.25 inches | Large living room display shelves, bedroom decor | $15 – $25 |
| Welded Heavy Steel Rod Backplate | 120 – 180 lbs | 1.50 inches | Heavy kitchen dinnerware, cookbook storage | $45 – $75 |
| Individual Threaded Blind Rod Pins | 40 – 60 lbs | 1.25 inches | Narrow bathroom vanity ledges, spices | $20 – $35 |
| Concealed Aluminum Cleat Extrusion | 30 – 45 lbs | 0.75 inches | Picture ledges, framed canvas displays | $25 – $40 |
Frequently Asked Questions
Can I hang floating shelves if my studs are not centered where I want the shelf?
Yes. If your shelf cannot hit two studs symmetrically, you have two professional options: either use a continuous steel bracket backplate that spans across whatever studs are available (even if off-center) and drill custom mounting holes in the steel plate, or build a torsion box shelf where the internal cleat anchors securely into the single available stud and utilizes heavy-duty 1/4-inch steel toggle bolts for secondary anti-rotation stabilization.
Why do floating shelves always seem to sag over time?
Shelf sag is caused by three primary factors: mounting into drywall rather than solid wood studs, using undersized screws that bend under tensile leverage, or wood creep in thin, unsupported timber. Using heavy-gauge structural lag screws and introducing a deliberate 1- to 2-degree upward pitch during bracket installation completely eliminates visible sag.
What is the ideal thickness for floating kitchen shelves?
For open kitchen shelving carrying heavy ceramic dinnerware, bowls, and Dutch ovens, a finished thickness of 1.75 to 2.5 inches is visually and structurally ideal. This thickness easily accommodates heavy 3/4-inch steel mounting rods and looks architecturally substantial against tiled backsplash walls.
How do I conceal the joint between the shelf and a tiled backsplash?
If installing floating shelves over a tiled backsplash, either install the shelves first and tile tightly around them, or tile the wall completely, locate the studs behind the tile using blueprint marks, drill through the porcelain or ceramic tile using diamond-tipped masonry bits, and mount the steel brackets directly against the tile face.
What wood species is best for solid floating shelves?
White Oak, Hard Maple, and American Black Walnut are the premier choices. They possess exceptional bending strength (modulus of elasticity), hold screw threads tenaciously, and resist surface denting and warping much better than softwoods like pine or poplar.
Master Execution Roadmap & Preventive Troubleshooting
Critical Phase Milestones and Quality Verification
Every master-level home and design undertaking succeeds or stumbles on the discipline of its initial verification phase. Before committing resources or making irrevocable physical changes, establish a clear tolerance baseline. For structural, architectural, or soil-based projects, measure twice, verify microclimates, test load capabilities, and review long-term environmental factors. Never bypass diagnostic staging; spending 48 hours observing ambient sunlight, moisture patterns, or surface moisture barriers prevents thousands of dollars in premature remedial repairs.
Establish strict quality gates at the 25%, 50%, and 75% completion intervals. If a joint is out of square, a soil amendment shows abnormal alkalinity, or an undercoat fails adhesion testing, resolve the discrepancy immediately rather than hoping finish coats or surface dressing will conceal underlying flaws. True professional craftsmanship is distinguished by the uncompromising rigor applied to the structural layers that casual observers never see.
Common Mistakes, Diagnostic Indicators, and Solutions
One of the most pervasive missteps among homeowners is material over-saturation—whether that entails overloading biological soil with synthetic nitrogen, rushing multi-coat paint applications without complete drying windows, or crowding decorative furnishings without sufficient negative space. When materials cannot breathe, cure, or establish natural equilibrium, early failure is inevitable. Maintain patient curing windows, ensure ample ventilation, and give living ecosystems the biological time required to stabilize.
Another frequent hazard is neglecting ongoing preventative maintenance cycles. Design systems and home environments operate under dynamic seasonal forces—thermal expansion, humidity fluctuations, UV exposure, and microbial activity continuously alter physical dimensions and chemical balances. Formulate a semi-annual inspection schedule: inspect caulking seals, monitor organic mulch decomposition, audit electrical connections, and service mechanical hardware before minor wear deteriorates into major structural failure.
Final Verdict & Practical Action Plan
Crafting and mounting custom floating shelves is one of the most rewarding master-level DIY projects you can undertake. It bridges the gap between precision rough carpentry and refined architectural furniture design.
By respecting the physics of cantilevered leverage, anchoring deeply into wall studs with structural fasteners, and taking the time to scribe and level with meticulous care, you create stunning, gravity-defying storage that elevates the character and utility of your entire home.